
No matter who you are, where you’re from or where you are right now – you are putting your head down somewhere. You have some kind of space that you are calling home, and that means that you have some kind of roof and at least one or two walls.
And walls means that you have big open, blank spaces to stare at every day. Staring at blank walls can be depressing, no matter how prettily they are painted. So here are some affordable DIY wall decoration projects to help you turn that blank space into something worth staring at!
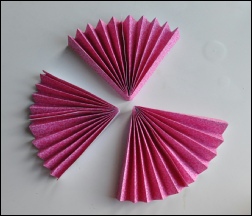
Make a backdrop with paper rosettes
Paper Rosettes are a pretty quick and very easy way to add color to any wall, no matter how big or small it is and no matter where it is. All you need is paper, craft glue or a glue gun and an empty space. The paper can be any color, any thickness, patterned or plain, pretty or ugly.
Your rosettes can be made out of just one style of paper, or they can be made out of three different styles, they can be big and they can be small. You can make a plain and simple rosette or you can make it multi-layered and complex. Just search online for images of paper rosettes and get inspired!
Make a canvass from melted crayons

This is the type of art project that kids will love, but not only – anybody with a creative or slightly destructive bone in their body will absolutely love this one. All you will need is a canvas or a plain old piece of project board, some glue and a hairdryer. You can try paper, but it needs to be mounted on something sturdy so that you can prop it up.
Simply glue your crayons to your canvas in any pattern you want to and wait for the glue to dry. Now prop it up in some way then use the hairdryer to heat the crayon until the wax begins to melt and run down your canvas.
Leave it propped up while the wax continues to run down the canvas, then dries and sets. You can use multi-colored crayons or you can use just one or two colors. The crayons can be glued in a straight line along the top, or they can be glued in random patterns.
Again, you can add elements such as a quote or a cutout and your rainbow or monochromatic melting design can go in any direction you would like. Search online if you need some inspiration or ideas and get as funky as you want to! And remember you can do this with normal paint as well! If you need to get anything for your work try Kohl’s – with coupon codes from Discountrue it’ll be super affordable.
Make a quilled monogram letter
This idea is great for putting your name up on the wall, or even a single word. If you have lots of patience, paper and time then you may even be able to do an entire quote. But just a single large letter with rolled coils of colored paper is absolutely beautiful, especially next to a bookcase!
They have a kind of minimalist appearance and because you’re making them yourself, they are always unique. Just make the frame out of thick paper or thin board. Letters are the easiest to begin with, but you can use any design that has straight lines, corners and thin paths for the quills to follow.
You can go as complex or as simple as you like, I have seen designs that you can’t see where one quill ends and another begins, and I have seen others with just a few quills that are absolutely beautiful and even breathtaking. But the keyword here is patience!!
Make a string art wall hanging
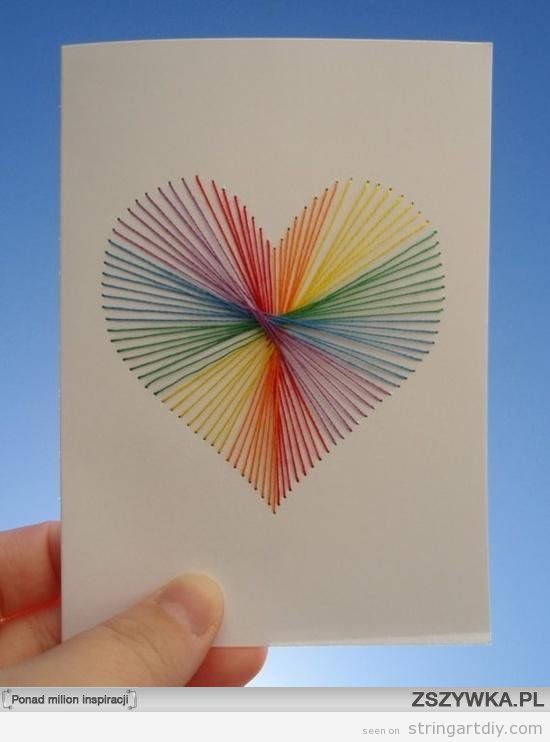
We have all done ‘Connect-the-Dots’ pictures, but this string art takes it to a whole new level. There are some designs that play games with perspective and have been created by master craftsmen, but it really doesn’t take any level of skill to create beautiful, eye catching designs.
The picture here shows a string art design made with project board which works best for designs that are a bit more simple although you can always try to get as complex as you like. There are also versions that use wooden boards and nails to create a more 3D design, although a corkboard and thumb tacks work almost as well.
You can ‘color in’ the inside of your design or you can create a negative image where the background is filled in. If you’re using paper or project board then make sure that the holes you thread the string through are sturdy and won’t tear over time. Some kind of hole reinforcement is the best option, paper for simple designs, metal ones if your design is more complex.
Make creative designs with tissue paper
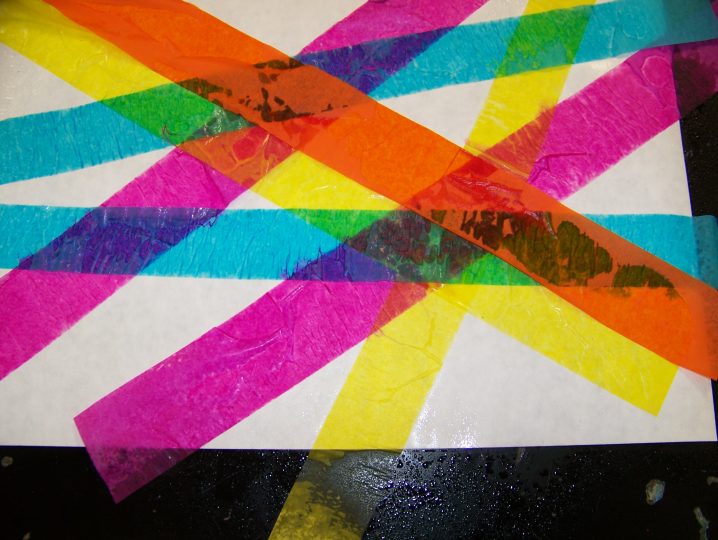
There are two different types of projects you can do with tissue paper and neither require spending a lot of money or a lot of effort. But they are both finicky projects because it is quite easy for the tissue paper to tear on you if you do not work gently enough.
For both projects you will need tissue paper, but the cheap and nasty kind that is not very colorfast – not that thick, expensive stuff you use for very special gifts! The next step and other supplies will depend on which type of project you choose, but you will need to cut out whatever shapes you are going to be using for your design before you get started.
Then you will either need to start layering your tissue paper shapes onto a canvas using thin layers of anything sticky that dries clear, or else wet the shapes and layer them onto a sheet of paper. This is the part where you will need to be gentle – both methods involve the tissue paper getting wet which means that it will tear if you so much as breath too hard.
These are just a few of the very cheap wall art decoration ideas of worked on lately but there are tons more. And all it takes is some patience, newspaper to protect your carpets, tables or other surfaces and a little bit of creative flair. Oh and did I mention that you’re going to need patience? Because you are going to need a whole lot of that before you get your unique, beautiful, eye catching, breath taking and all other similar phrases wall art projects completed!


