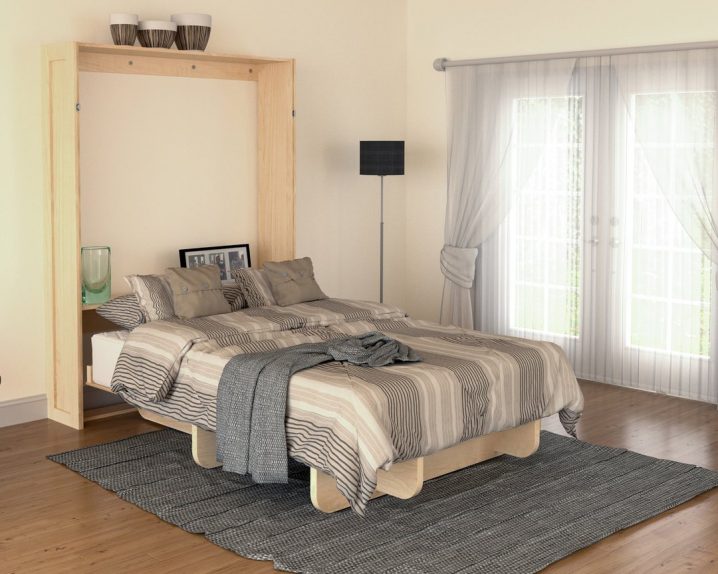
Getting a Murphy bed may be the answer if you got problems in terms of home space. However, there are still things that are up for consideration like what type of Murphy bed you want to have, and the budget that you are going to need for such a bed.
12 Steps in Building Your Own Murphy Bed
Once you have the necessary tools and equipment that you are going to use in building a Murphy bed, here are the steps in building one:
Step #1: Start building a frame or box for your mattress.
You start this step by getting your four pine boards, and then you form it into a rectangle, or a box. This box will contain the mattress. Then cut two boards with 76 inches as its length and then the other two boards shall have a length of 55 inches.
Connect the two short pieces at the ends of the two long ones and then adjoin it with screws. They should be screwed per joint and then place the steel braces. These shall have two per corner and you will have to use the cordless drill and then fit in the 3/8-inch screws.
Step #2: Place the Back to the Mattress Box
This is the vertical wall cover of your Murphy bed. This shall be made out of ½-inch plywood. You will have to rip two full sheets one will have a measurement of 55Lx48W inches and the other one will have a measurement of 55Lx29W inches. End it by securing both sheets on the back of the box you built.
Step #3: Place the Seaming Board
Now you rip a strip of that 1/2 -inch plywood with a measurement of 55Lx5W inch and then put this on the seam between the two sheets of plywood in the mattress box and then screw it into place on both sides of the seam.
Step #4: Start Building the Bed Cabinet
You should see to it that the cabinet is going to be secured vertically to the wall. The cabinet shall likewise receive both the mattress box and the mattress itself when the unit is going to be closed. You build this by ripping full sheets of plywood in order for you to create two strips, and this should be 96Lx10W inches. Then, you rip and cut width-wide another board with a measurement of 58Lx10W inches.
See to it that the three boards are secured and will form a U shape. The two long boards shall be placed on each side and the short board shall be placed on top. Then you use the corner braces and a 3/8-inch screw in order to hold the boards together.
Step #5: Stabilize the cabinet against the wall.
You should see to it that you square up all the corners in order that both the long sides of the cabinet are in a parallel position. Then, measure the inside of the cabinet. The width should be 57 inches. The next thing that you will do now is to cut a 2×4 to its length and see to it that it is secure to the wall at every stud location. Then place it with 3-inch screws that have been pre-drilled with the pilot holes. You should make sure that the 2×4 is leveled with the laser lever with a height of 14 inches. Then tack the two sides to the ends of the 2×4 by using two 1-inch screws.
Step #6: Now you put a front board to the Cabinet
This step is just the same as the previous step. You do this by cutting another 2×4 with a length of 57 inches, then you level it and then tack it into the inside of the cabinet with height at 14 inches. This should parallel the previous 2×4.
Then you cut plywood with measurements at 57Lx10W inches and then you add this to the top of the 2×4 by using 1-inch screws in order to create a shelf.
Step #7: Add a board to secure the top of the cabinet.
In this step, you will have to cut another 57 inches long of 2×4 and this will be similar to the lower back 2×4. Then you secure it at about 6 feet by tacking from each of the sides by using two screws. Then you bolt it into place on the wall by using 3-inch bolts and washers.
Step #8: Now adjoin the Mattress Box and the Cabinet
Now that you have a mattress box and the cabinet, it is now time to place the mattress in the box and then the box in the cabinet. Do not forget to install it in a vertical position. Then you go mark a line from the shelf you created onto the back of the cabinet box, serving it as your hinge point. After that, you remove the mattress and the mattress box and then return the box to the cabinet which should be placed directly on that line and then mount the two hinges at the same spot.
Step #9: Time to Face the Bottom of the Cabinet
In this step, you will have to cut a piece of a half inch of plywood. This shall have a length of 57 inches and width of 14 inches.
Step #10: Create the Locks Dedicated to the Bed
When the Murphy bed is closed, of course, it must be in place and must be locked. You can create locks by drilling a hole on every side of the bed cabinet with a height of 6 feet. Each of the holes should have a diameter of 1/2 -inch. Then you angle the holes slightly downward in order to prevent the bolts from slipping out.
Step #11: Create the Locks Dedicated to the Bed
In this second to the last step, you will have to cut trim in order to size and then nail the bed cabinet into place with the cordless.
Step #12: Finally, attach the bed’s front legs.
Of course, if you find these steps to be too complicated, there is always your reliable Murphy bed sellers, and choose the best one that will suit your needs.


